Friday 30 August 2013

Finished front yard

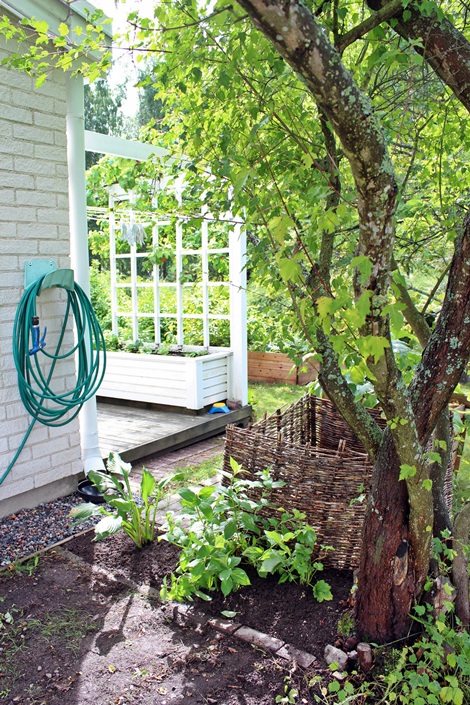
I promissed here in the post about the dry landscape garden to post about the plants me and my neighbour were planting in the front yard. The front yard has been finished for a long time, but I haven't seen my neighbour in days and I've forgotten what are the names of some of the plants we planted. Maybe I can update this post once I know the names.


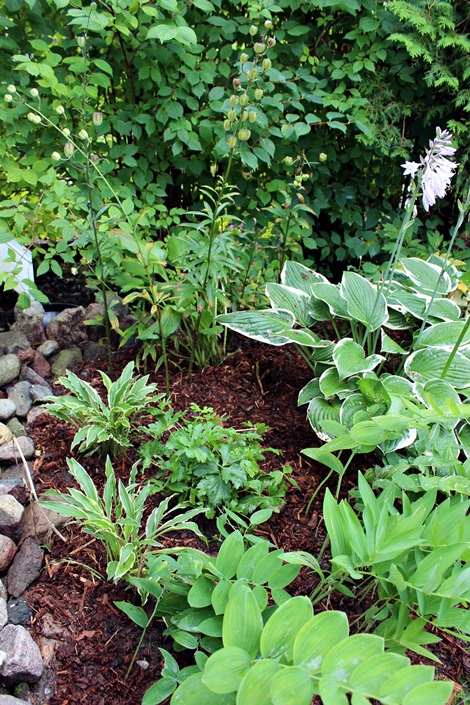
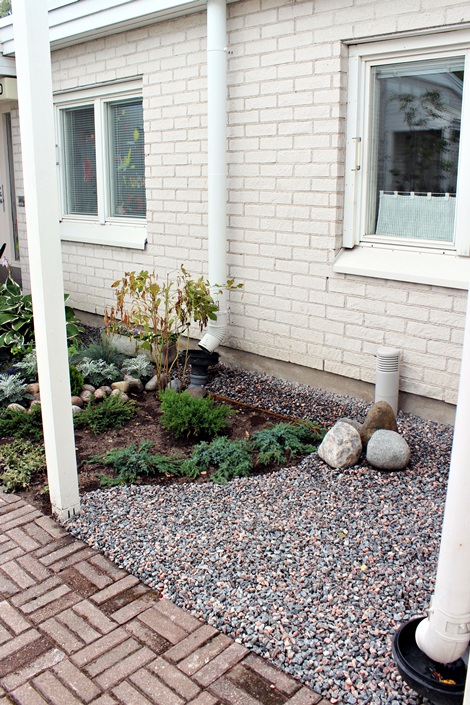
I bought only four plants, all junipers. Three junipers called Blue Carpet, there on the picture next to the gravel, and one juniper Andorra compact, it's supposed to grow into a wide circular but low bush, that is the greener plant on the picture. Both me and my neighbour agreed that the area needs either perennials, which grow new shoots each year or something really low that can tolerate the heavy load of the snow that is piled on this area every winter. 


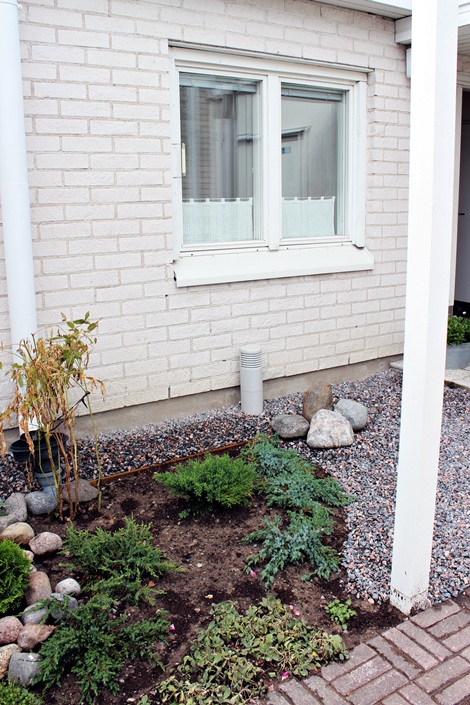
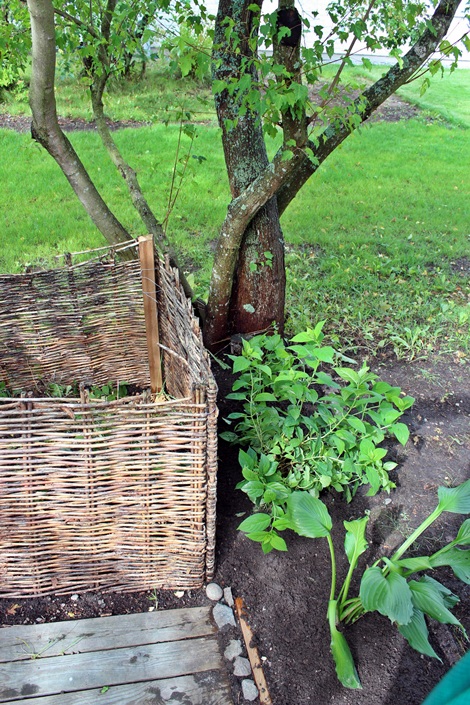
My neighbour planted two junipers more, similar to my Blue Carpet, but just less blue, also she brought from her cabin the Goat's beard plant, that is now planted in front of the rain water shoe. It looks a bit sad now, but it will perk up and next year it will look amazing. Also next to the white pole I planted a Carpathian harebell from our back yard, where it was not getting enough space. On the front is also some plant my neighbour brought from her cabin. I do not know the name of that, but according to her it grows easily to cover large areas and apparently has white flowers on spring.


I'm pretty pleased with our front yard. I hope everything thrives and that all of these survive the winter. But if not we can plant something else next year.


Wednesday 28 August 2013

Head"board"

Creating a headboard for our bed has been on my list of to-do's for years. Now because the kid is on it's way and we have placed the crib in the bedroom in the foot of the bed, there really is no room for a headboard. There is only a narrow path between our bed and the crib and even with the slimmest headboard the path will get too narrow, we need every cm/inch we can have there.


Instead of a proper headboard I thought of hanging a canvas on the wall to represent a headboard. I had bought a Marimekko fabric Räsymatto long time ago for a totally different project, which I then desided against on. Since I had that fabric and I still like it a lot just not with the project I originally thought of, I used that for a headboard.


I bought a piece of molding, cut that a bit wider than the fabric, then drilled two holes on the ends of the molding. I painted the ends of the molding with the same paint as I had painted the bedroom walls.


I sewed a casing on the top of the canvas where the molding goes through. Then drilled two holes high on the wall and hung the canvas with screws. I did also touch up the heads of the screws with the wall paint so those would be less visible.


I have seen these types of fabrics hung on the head of the beds in various design magazines. I must admit that I'm quite sceptical if these are very handy. I know they can look good, but what will happen when we lean onto the wall? Because I do not know anyone who will just lean, people will also slowly slide down against the wall. Will the fabric stretch or even rip eventually? Any experience, anyone?

Monday 26 August 2013

The 8th annual crayfish party

It was time of the crayfish party again. Amazingly it was already the eighth crayfish party in a row. We have never skipped a year and it's been held every time at our friend's cabin. The menu is always the same, but why change something that works.


Friday 23 August 2013

Flower bed upgrades

In addition of creating totally new flower bed next to the compost bins I've upgraded the existing beds a bit too. In a post from May 2011 I planted some ferns, old fashioned bleeding heart and christmas rose on the bed in front of the thuja trees. Here is a picture of the bed back then. 


Aren't those just tiny! After a while the bed looked like this. Still quite bare and empty.


Then at some point I had apparently planted some tulips and hostas and common solomon's seal which I later transplanted into a different spot. Under is a picture from May 2012.


After two years there were still some bare spots. I had moved the tulips a bit to the left side of the bed. But since tulips only bloom on the spring and die sometime during early summer I needed something that grows on that spot later in summer and covers up the empty space. Also I seem to have moved the turks' cap lily bit further back, those also bloom on the spring and do not have good coverage of the area later on summer. In that area I now planted a hosta. The old fashioned bleeding heart seems to also have the same problem as the tulips and lily. It goes all yellow and ugly later in the summer, so I needed something to distract the eye from that too and chose to put more hosta there. I seems I like hostas... Here is what the bed looks now.


  1. Christmas rose, three plants actually. Those have not bloomed that well, but I like the foliage too.
  2. Hosta, I'm not sure which, it was in our garden before we moved in, these I just transplanted here. The leaves are light green.
  3. Ferns, those have now died for this summer, but grow very nicely early on spring.
  4. Old fashioned bleeding heart, it has beautiful white flowers, but it dies quite early in the middle of summer. 
  5. More hosta, this particular one with white edges on the leaves.
  6. Windflower, there are actully two varietes, the other one is near the number 10.
  7. This is a place for the summer flowers that are not winter hardy. I need this area for wintering the peppermint and the bonsai, so I need to dig out the plants each fall from that area.
  8. Turk's cap lily has bloomed already. It has not been a huge success, there is one red beetle that keeps eating the plant and I have not been quick enough to keep the beetle away.
  9. Common solomon's seal, when I bought it I though it would grow tall, but this particular one does not, so I moved it some time ago from the back to the front.
  10. Some new hosta 'stiletto' with cool narrow leaves and white edges. 

I did upgrade another flower bed too next to our terrace pergola. I do not think I've shown this bed before here on the blog. On that bed I used to have a climbing rose New Dawn, but it did not really thrive. Even though I did cover it in winter at least some of it's branches froze every year and I had to cut those off. So it never got really big and it kept growing wild root shoots, which grew much faster than the actual plant. Ofcourse once the rose did bloom it was beautiful, but the flowers did not last long and there were only a few of those anyway. So the rose had to go. On it's spot I planted a climbing hydrangea. I hope that is more winter hardy and blooms longer.


And here is the whole bed, everything has bloomed already, but here is the list of the plants anyway.
  1. Lily of the valley, this has spread quite nicely.
  2. The climbing hydrangea
  3. The original hosta plant, which I have now divided to many places in the garden
  4. Peony, this one has bright pink ball like flowers
We'll see how everything looks like next summer. I do like perennials, it's so easy to move them around and on spring those just grow from under all that snow and dirt and suddenly everything is filled with plants.

Wednesday 21 August 2013

Bumper pad for the crib

From my own childhood I have an under sheet that was used a lot in my bed. I have never been able to throw that sheet away, even though it's in quite poor shape. I cannot remember when I got that sheet, perhaps when I was around three years old and used it for a long time. I think I remember having the sheet in my bed even when I was in high school.


For someone in high school the sheet is perhaps a bit embarrasing, because it has images of trains, this is the sheet which I mentioned in this post, where I said the sheet reminds me of the Marimekko Bo boo design. Some months ago I took the sheet down from where I have been storing it and examined it's condition. It was very pilled and the print colours had faded especially from the center.


The egdes were on better shape, although even those could look better. I wanted to make something from this sheet, I was just unable to throw the sheet away without even trying to use it somehow. So since the ends of the sheet were only somewhat usable I had to make something long from the sheet and then it occurred to me to make a bumper pad for the crib from it.


I used the train fabric only on the surface that faces the inside of the crib and used some old linen fabric on the other side. On the top I added some ribbons so the pad can be fastened to the crib. Inside is some wadding. I could have designed the placement of the ribbons better and there could be more of those, so it would be easier to attach to the crib, but this works too.


I was really lazy and did not measure the circumference of the crib and the pad is bit longer than needed so it's just layered twice partly, but that's fine. Also I seem to be unable to take in between photos these days. I just always forget. Anyway I think the bumber pad is awesome! Love the trains still.


Wednesday 14 August 2013

For our neighbour

We live in a rowhouse and because of that I have two nextdoor neighbours. The other one who helped me with the front yard lives on the left next to us. Between our back yards are thuja trees and a flower bed on our side. The neighbour on our right has a back yard behind the corner of our house. And on that corner I have two compost frames. I wonder if they have enjoyed that view. I did ask them if I can place the composts there and they say they did not mind them, but I somehow doubt it.

After two years the other compost frame was all lopsided and ugly even to my eyes. So in the name of good neighbour relationship I straightened the compost frame and created a flower bed next to the frame to cover the view for them. I was a super lazy blogger and did not take any before pictures, but I'm sure you have good imagination. Here is a picture of the frames back in 2011.


The wicker compost frame was a bit flimsy so I added a wooden pole on one of the corners of the frame and supported the two sides to that. Then I dug off dirt from the side of the compost and took out all roots and weeds.


I added an egde from paving stones on the neighbours side of the flower bed and just a piece of timber on our side. Then I first planted some hosta there, which I divided from a big bush of hosta elsewhere in our backyard. I bought a hydrangea bush which I planted in the middle and windflower next to the maple tree.


If I was my neighbour I would enjoy my new view on plants instead of a compost bin. Some grass seeds could be planted in front of the flower bed. It's still bare from the pipe renovation we had earlier.

Monday 12 August 2013

Ripple blanket for the kid


I have crocheted this blanket forever! I started it way over in May. It did not take long because it is very difficult or because it's big, but because doing this sort of static work for long periods of time now that I'm pregnant has been pain. If I sit down for too long the muscles around my chest get really tense and create pain. Also now that I cannot eat painkillers other than paracetamol, which is a useless drug for muscle pain, atleats for me, it's been easier to avoid crocheting and knitting. Now that I'm on maternity leave and do not have to work in the office in front of a computer all day, the muscles don't get that aching so easily and I've been able to crochet a bit more. So the blanket finally got done! Whew. I was even starting to get bored of the whole project, too many months of looking at the same thing.


I got the pattern for the blanket through Ravelry from a blog Attic24. On the blog are excellent pictures and explanations about the pattern. The blanket isn't very big, it should be quite good size for using in the prams or in the terrace cradle. All the yarn is from Hemtex and it is cotton yarn, they happened to have some sort of sale when I bought the yarn.

Friday 9 August 2013

Raised beds update


For the smaller raised bed I made I planted cucumber and for the bigger one two rows of potato. I think I have bit neglected the raised beds and the whole back yard actually, because I have totally forgotten to water the plants. I had given some cucumber seedlings to my coworker and he said that they've gotten lots of big cucumbers from the plants. In my cucumber bed only one cucumber is big enough to pick. It has been really dry and it's no wonder the plants are not growing that fast. I've got to step up on this one so we get any crop. The potato is also growing just long stalks, hope there is some potato too under the surface.


Wednesday 7 August 2013

Bedroom painting is done

Remarkable, only a week and the bedroom is all painted. Wohoo!! Last week I wrote a post about starting the painting. So I removed the moldings and teared the loose wallpaper away. I again did not remove the wallpaper fully. From the experience from the office I know it just is too much of a hassle. Besides the result with the wallpaper under the paint is not bad at all, maybe the edges can be seen a bit, but that fine for me.

I spackled the edges and the holes of the wallpaper and then sanded the spackle smooth. The amount of dust from the sanding was overwhelming, luckily I had covered the bed with sheets so it did not get dusty.


Then some covering of floor, taping some edges and then finally painting. I almost run out of paint so I had to water it down a bit for the last wall but the coverage was still good, so I was lucky that I did not have to get another bucket of paint. I had chosen a very light gray colour for the walls.

The window wall did not have any wallpaper and it was originally painted white, but after I had painted the wallpapered walls the window wall looked really dingy. I tried washing it but it did not help, so I painted that too. But I used plain white on that wall.


Once all the painting was done I attached the moldings back. I was luckily wise enough that I had written on the back of the molding which piece goes where. The molding were originally nailed on the walls but I prefer screws, those are much easier to handle especially if those ever want to be removed and put back again. 


Bit murky picture above but there is the corner of the window wall painted white and the wall painted light gray. The gray I chose does in my opinion have a slight green tone, which was not my original plan. According to my sister all the walls are white and according to A the walls are gray, but once I mentioned the green tone, he said that he might see it there. So maybe it's gray enough.


So above the bedroom wall first with the light on and then with the ceiling light off. The pictures are a bit grainy, sorry about that. And underneath is the wall before.

Monday 5 August 2013

Carpet washing

I have written a post about this before, but I thought I'd repeat it, since I know this is so exotic to those outside of Finland.

Most cities in Finland have free places where people can wash their carpets. Those have metallic tubs with a wooden counter. Cold water comes from hoses and the used water runs to the citys sewer system. There is also huge amount of wooden racks where the carpets can be left to drip dry.


This time I went to the rug washing place together with A. The living room carpets is so heavy when wet, I could have never handled it alone. We also washed the rag rugs from the conservatory, finally. There were lots of people at the washing place, and I did not want to bother them by taking that many photos, but check my old post about rug washing, it's from the exact same place.

Friday 2 August 2013

The simplest but tastiest desert

I'm not much into deserts, except for the random piece of chocolate or cookie with coffee. But sometimes the desert is just nice to have.


I love Pavlova desert, it has a meringue base with cream on top and berries, lots of berries. It is usually one big round cake, but for people of two or even four that is just too much. So Pavlova in a cup is more better suited for us. This is also super easy to make, expecially if you buy the meringue instead of making your own. I have occasionally made meringue but I've never managed to fylly dry them in the oven, it just seems to take forever. 

What you need is meringue pieces, whipped cream (,some sugar or sweeteners) and berries, the more berries you have the better. Meringue goes in the bottom of the cup, then that is topped with whipped cream. If the berries are not very sweet like the currants then some sugar can be added to the cream, also icecream sauces can be used, or some flawoured syrup. The desert is decorated with a huge pile of berries. And tadaa, it's done.


I have a thing for meringue. So if that is not for you try cookie pieces instead, but then it's not a Pavlova anymore. But equally easy.
Related Posts Plugin for WordPress, Blogger...