Monday 30 April 2012

Excellent weather

I had been meaning to finish the spring cleaning by cleaning the cleaning cabinet itself, but the weather has been so nice that it would have been a sin to stay inside. So instead on saturday I sanded and jigsawed on the terrace, but nothing is finished yet. And on sunday I did some weeding in the garden and some reading in the conservatory where it was actually hot.


This evening and tomorrow we will be celebrating May Day, which is a big deal here in Finland. Tomorrow we have national holiday, yay! A made Sima this year and we've took a head start and have been drinking it on the terrace while enjoying the warmth of the sun.

Wish you a nice 1st of May!


Friday 27 April 2012

How to clean a humidifier

We have a very old mustard yellow humidifier, look at it, isn't it beautiful? I'll let you admire it for a while


Wasn't that just beautiful.

Anyway, it's a working devise, despite it's looks, but after whole winters use it's become limy and not clean looking from the inside. I also suspect it would work better if it's not covered in lime. So since I'm an organized and anticipatory person I desided to clean the inside of the humidifier now before I place it in deep storage.


So how to clean a humidifier, and I mean how to clean a humidifier that works with an old fashion resistor and not one of those ultrasonic humidifiers or some other gizmo that I don't understand.

The cleaning is easy and you don't actually have to do much anything. The steps are:
  1. Open your humidifier
  2. Pour in a solution of 1:1 vinegar and water so that all icky looking parts are covered
  3. Wait
  4. Wait a little longer
  5. Brush clean
  6. Rinse
Once you pour the water and vinegar solution in the humidifier the lime starts to dissolve and some bubbles will form. I just left the solution in the humidifier for about 12 hours. I was supposed to leave it only for few hours but I forgot the whole thing and went to bed because it was bed time and then finally remembered the thing on the morning. That didn't matter at all, the longer you leave it be the better. Then I brushed the resistor and the inside a bit to make sure all the lime was loose or dissolved. And rinsed the inside. Whole lot better.

Wednesday 25 April 2012

Quick building greenhouse

I have tomato seedlings again. I sowed many seeds on smallish pots, about ten per pot. I used cling foil to keep the growing contitions humid and light.


The cling foil was actually placed on top of the pots much nicer at first but then the seedling grew so long that they hit the cling foil and started to bend under it.

First I thought of making a tent out of grill sticks and cling foil. But found out a much quicker and easier solution. I just placed jars upside down on top of the pots. Looks odd, but works perfect and gives the seedlings longer time to grow before replanting.


Monday 23 April 2012

Bedroom spring clean

We have a few bad habits, one of them is that we never ever fold our clothes when we change from the day clothes to pyjamas. We just place all the clothes on this small table in the bedroom.


Sometimes the pile is so big that the clothes on top keep falling on the floor. We've tried to change our habits, but so far with no lasting results. Next to the table is a small shelf and the plan is that we would fold our clothes on the shelves. But it seems to be very difficult. Very very difficult. The table is very pretty, it should be seen and not being covered by all those clothes.

I folded all the clothes and placed my clothes on my shelf, then folded all A's clothes and tried to place them on the shelf but it was allready so full that I had to leave them on the table.


Once I had done that I started removing all the underbed boxes to vacuum and mop the floor. I was supriced to find there one bottle of apple wine that we had made on the fall of 2009. I had been sure that we had drunk all the wine ages ago. That was a fun surprice.


I took the wine out from the box and since it's now empty I will take the underbed storage box to the outside storage room.

After I had most of the floor vacuumed and mopped I pulled the bed and the night stands away from the wall and cleaned the area under them. We also have some wires cables going under the bed for the lamps and the cell phone chargers. 


Those collect so much dust that I desided to contain them somehow. I had a bit of that wire cable tube thingy at home and used all of it. I think I will go and buy more, because it's good to have that at home in case of wire cable emergencies. 


After that was done, I pushed all the furniture back in their place and wiped all the other horizontal surfaces. 

We have a huge round lamp in the bedroom and I desided to dust it. It collects lot of dust. I placed an old sheet on the bed and dusted the lamp, since always some dust drops on the bed instead of getting cought on the duster.


I took pictures of the cleaned room after a few days on day light. I'm very annoyed that allready after a few days I can see new dust forming of top of the furniture. I guess it's all the textiles that make the bedroom so dusty. But here is after.


Would you have any ideas how we could motivate ourselves to fold our clothes, or would you have some other alternative for the folding of used clothes? Folding the clean clothes after washing has never been an issue, which is weird.

Friday 20 April 2012

Stools!


It took longer than I thought to finish the stools I had got some time ago. It would have been fast but the weather has been weird. It has rained a lot and we've got even new snow on some days. But two weeks ago on Saturday the weather finally turned nicer and I was able to take the stools to the terrace and finish removing all the old paint from the stools. I used a chemical paint remover, that I happened to have at home. Since it smells awful and the removed paint goes all over the place I wanted to do that outdoors. The stools had quite many layers of paint, if they wouldn't have been so thickly painted I would have just lightly sanded them and repainted. But now I removed all the paint.


The first paint had coloured the wood, but that's okay, since I did plan to repaint the stools anyway. After I had removed the paint, I lightly sanded the stools and let them air a bit outside since they still smelled of the paint remover.


Then I took the stools inside and painted the first coat with primer, then two coats with the finishing paint. I had an idea that I wanted to paint the stools with some fresh funky and different colours. I bought one new paint jar, yellow furniture paint. I also already had dark red and white furniture paint. I thought the red paint itself was a bit murky, so I tried mixing some white with it. But it turned out like berry porridge. It didn't look fresh at all. Then I thought of mixing the green blue colour we used to have in the kitchen wall with the white.I liked it. It won't probably be as durable as the real furniture paint since it is furniture paint mixed with wall paint, but I don't think it matters.


See how happy they turned up. I couldn't be more satisfied about the result.


Thing is though that we don't really need many stools, but those are just so cool that I have to have them. For now I placed the smaller one in front of the office arm chair to work as a foot rest and the bigger one to work as a small table. We'll see where those end up. And yeah, that's a totally staged picture, I'm not currently reading that book. 

Wednesday 18 April 2012

The Big Bathroom Cleaning Day

The Spring clean has proven to be more difficult to handle than I would have assumed. I've managed to clean all places almost according to the schedule, but thing is that I've concentrated on it so much that while one room is under the spring clean the other rooms are neglected. That means that we have not vacuumed other rooms in weeks, or done the dishes in weeks, or changed the sheets or dusted or anything in any other rooms. Which is horrible. Our place is a huge mess. It hasn't also helped that we have been getting all sorts of stuff from A's relative who passed away. I also blame the fact that A has been home because of his sick leave and of course anyone who is home all day will start to do things and clutter places. I'm sure he's put many of the stuff back after he has used them but he's also forgotten some, which happens, it's called living.

When I came home from work on Monday and looked at our home, I realized how messy it was. I had a painting project that I did in the bathroom and I thought that I will finish the painting and then we will start a cleaning session, but the painting took longer than I thought and suddenly it was nine o'clock in the evening. Then I suggested to A that we should clean the apartment on Tuesday. We usually clean so that A vacuums all rooms and wipes the kitchen counters. I clean the toilet and the bathroom and dust everywhere. It usually takes us about one hour, but now I decided to clean the toilet, bathroom and sauna more thoroughly since it was the bathroom week of the spring clean (no, actually it was last week, but I hadn't cleaned them yet).

I had cleaned the toilet floor last week, so in the toilet the cleaning was easy, just wiped all surfaces and the mirror, cleaned the toilet seat and the hand washing basin. I could still wipe all the walls and the door. But that's left for some other day.


I washed the sauna first since all it's water runs from the sauna to the drain in the bathroom side. Then wiped the counters, cleaned the toilet seat, all the walls, the shower, the floor and finally the hand washing basin. That took forever. Maybe I clean the bathroom too rarely since I seemed to have no routine how to do what. I had all sort of buckets on the way and had no place where to put the shampoos and soaps while I was cleaning. I just moved everything around.


Now the bathroom is so wet, but clean. I placed the shower curtain to laundry, so the bathroom seems a bit gloomy and hospital like. But anyway, the bathroom cleaning is done. Also A did vacuum, so things are looking better in the rest of the house too.

Next on the spring clean, the bedroom, maybe about that on friday's post.

Monday 16 April 2012

The mysterious 73

With the sheets we inherited we also got kitchen towels and some embroidered band. It had numbers 73 emroidered on it. I thought it might have been a clothes size, but then realized there is no size 73 in anything. And then I realized I was looking at the band upside down. I felt so dumb! Of course it was EL not 73. I was pretty embarrassed. I'm sure you would have realized this thing in an instant.


Well that happens, I'm not the sharpest pencil in the box all the time.

The towels we got did not have any loops where to hang them. I thought that since the towels were inherited from this EL person that I could sew the loops from the EL-band. That way we would remember easier where we got those towels from.

First I found out where is the middle of the towels by folding them to half and marked the fold.


I attached the loops with pins and hand sew the loop on.


That didn't take long. And now we have four new kitchen towels to use.

Friday 13 April 2012

Inheritor

I am an inheritor.
I inherited huge amount of sheets, glass jars and other nick nack!


That is not even all of it. Actually A is the one who inherited I was just given those things since all in A's family know how much I like to do crafts and how much I enjoy old utility items.


The person A and his family inherited had one closet full of old white linen and cotton sheets, it was unbelievable. I've never ever seen anyone with such an amount of sheets. A's mom took many of the sheets also A's uncle's wife took a huge pile, but still to me was left to give a humongous pile too.

Most of the sheets have yellowed over time and don't look too fresh. Especially the linen sheets are very yellow, the cotton sheets are a bit better. I've occasionally used chlorite to whiten cotton but I had no idea how it would work on linen. I tryed to google about it but couldn't find any trustworthy info. So I figured I need to try it on my own. I took one pillow case, dilluted the chlorite down with cold water (about 1/20) and sunk the pillow case in the solution.


I waited for two hours or so and rinced the pillow case clean. Then I washed the pillow case and let it dry. And it did turn much whiter. The lace on the side changed to blinding white since that was cotton but the rest of the pillow case looks much much better now too. Here is before and after.


Please ignore the fact that the pillow case is not the same one. I assure you the left one turned equally white as the pillow case on the right and the pillow case on the right was equally yellow as the pillow case on the left. I whitened whole bunch of these pillow cases and sheets after this experiment and I guess I got them mixed up and took photo of the wrong one. Trust me, it worked. Now our bathroom smells like swimming hall. I run out of chlorite so I need to get more before I can continue the whitening.

I guess you must be wondering what I will do with all those sheets. Because you are right I will never need as many sheets and I allready had good white sheets. Thing is that I don't need sheets, I need fabric. There is always a need for good white cotton or linen fabric. Here are just a few ideas that have popped into my head.
  • curtains, this and the next one are especially good for the monogramed sheets that I'd like to keep intact
  • table cloths
  • napkins
  • clothes
  • chair cover
  • ironing board cover
  • duvet cover from two sheets
  • basket cover, can you notice I'm repeating the term cover here
I haven't decided what I will do. If you have any cool ideas please share.

PS. Could someone tell me if this chlorite is the thing that is often referred as bleach? Or is that something different?

Wednesday 11 April 2012

Toilet floor

I didn't really get anything done last week in the office conserning the spring clean. We did organize some papers, but that's about it. The whole room is such a mess because it's under renovation so I wasn't really inspired to clean there.


But this week is dedicated to the bathroom, sauna and toilet and it will be lot more straight forward to clean those places. We have similar flooring in the bathroom and toilet, hexagon shaped tiles. The tiles are ok and in the bathroom those are easy to keep clean. The toilet is more tricky. The thing is that there is no drainage well on the toilet floor, so all the water that is poured on the floor has to be collected with sponges off the floor. So far I've just wiped the toilet floor with damp mop but the mop does not really clean the grout between the tiles.

I used hydrochloric acid to clean the grout. It's not my favourite stuff, I'd rather use something else, but we once bought that thing and it was only sold in one liter bottles and lot was left over from the project we bought it for. The hydrochlorid acid smells awful and since it's acid it's corrosive so I need to wear protective cloves and eye protection. I've previously used a product specially designed for tiles in the kitchen and would have used that but I didn't have any home. That product is also horrid smelling but not as horrible and not as dangerous as the hydrochlorid acid.

Well anyway I used that, it needs to be watered down from 1/10 to 1/30 but it's still not healthy stuff. Since the stuff only really works well on the grout I spread it with a toothbrush just on the grout. I let the stuff bubble there for a while, then I brushed the gunk loose.


Then I wiped the whole floor clean with a rag and some normal cleaning product and rinced with a sponge. I did also wash the wooden lath rug thingy, what ever that is called.


Here is before and after side by side, from one of the most icky spots.


In the end there is not a huge difference on the floor, but it sure feels a lot more nicer to walk on bare foot on the floor now that it's thorougly cleaned.


Edit: Once I published this I realized that I might not have emphasized enough that I do not suggest you to run out and buy hydrochloric acid, there are lot of products in the market that are equally effective (or at least effective enough) but are way more user friendly and healthier. I mean the acid is scary, use it only as your last option.

Monday 9 April 2012

Crocheted rag rug

When I was supposed to spring clean the living room I instead started to crochet a rag rug, which is a total opposite of cleaning because it's so messy. Crocheting itself is not that messy but since I did not have weft rags I had to make them and that is so dusty.

You remember 
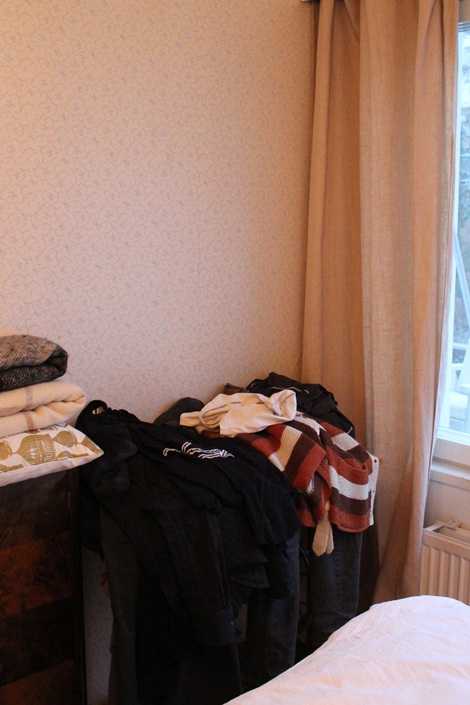
the pile of T-shirts we found from A's closet that we placed in the rag pile? I cut out weft rags from those and also from some other shirts we had in the rag pile.


I cut a long strip from the shirts which was about 1,5 to 2 cm (0.6 in about) wide going round the shirt until I either hit a print (like in that shirt on the picture) or the arm pits. I wanted solid coloured weft rags. Each stripe I made is from a different T-shirt.


I used the biggest crocheting hook I have which is size 6,5 mm (here is a hook comparison chart, since US, England and Canada seem to use different size specification). A bigger one could have been even better. I made a nice lenght of starting chain and then crocheted the whole rug with double crochet (ok, I'm a bit baffled, the translation table I found says that in Britain the term double crochet is used and in US a term single crochet. How difficult is that! How about the rest of the English speaking world? Anyway here are pictures how to make it).

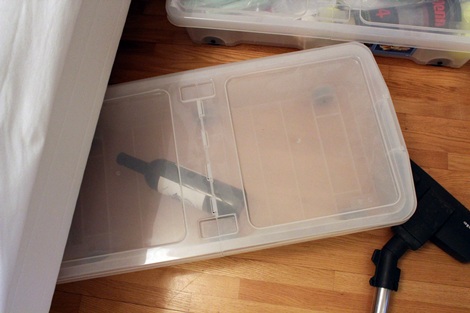
When the rug was done I popped it in the washing machine and washed all the dust away. The corners of the rug curled easily so while the rug was drying I tamed the corners down using some food containers and rocks.


Once the rug was dry, which took almost two days since the rug is so thick, I placed it in front of the terrace door. I put an anti-slip membrane under the rug since it would not stay put without it.


Here is by the way the rug we used to have there. In a way it was a good rug, it was made of coconut fibers I think and dirt did not show on it. But it was falling apart, the glue on the back side of the rug was crumbling away.


I know I will need to wash this new rug from time to time, but I like it a lot more than the old one. Maybe it is only because I made it myself or because it's more colourfull. I'm also real happy I got some use for most of the old T-shirts.


If you want to make a rag rug which is an excellent use for worn out clothing or any fabric, I really suggest making the weft rags on summer and OUTSIDE. The cutting created so much dust and mess. I cut the weft rags with scissors, since the fabric was tricot jersey knit, but when using regular linen you can rip the fabric into strips.

Friday 6 April 2012

Yarn ball tutorial - sort of


When I showed you the Snowball string of lights I did not have any tutorial on how to make the balls since I had made them pre-blogging. Now I made new ones, just not snowballs, but Easter eggs. I picked up from a local decorating magazine Avotakka a recipe for making the yarn balls. I had previously used wallpaper paste to make the balls but in the magazine there was new paste idea that I wanted to try, it was sugar paste.

I filled some water balloon with air and tryed to form them to seem more like eggs. In the Snowball version I tryed to form them to balls obviously.


The paste required equal amount of sugar and water in volume. I boiled the water first and mixed it with sugar like the instructions said, but the sugar didn't seem to dissolve totally so I microwaved it a bit too. Once the sugar had dissolved and I had made small bundles from wool yarn I dipped those indivually to the paste and then I rolled them over the water balloons.


That's when all the fun started, firstly the yarn got strangled many times, eventhough I tried to be carefull. Then the paste was so sticky that it was very hard to use. When I tried to take a piece of yarn to tie the balloon to dry I was stuck with all the pre-cut tie yarns. I hated that paste. In the end I had the paste all over the place. I wanted to take pictures of the process but my hands were so sticky.


Here are all of the balloons drying, which actually took some time. Even on the next day they were not fully dry. I cannot remember having that same problem with the wallpaper paste. I might remember all wrong but I think those were dry in a matter of hours.

Also when I did the Snowballs I first rolled the yarn over the balloon and afterwards dipped it into the paste, then I wiped the excess paste off. That way I got exactly the amount of yarn I wanted on the balloon and I did not have to quess how much is good. Also even when the yarn eggs were dry they look wet and I don't like that look. They still look icky to me.


Maybe this sugas paste thing is good if you want to make these with kids, since there is no harm eating some of the paste, but next time I will stick to the wallpaper paste. But in the end I did get some yarn eggs, which is cool.

Have a nice Easter and hope you have a Good Friday!

PS. We have national holiday on Friday and Monday. No work, Yay! How about you? And by the way in Finland the Good Friday is called Long Friday.
Related Posts Plugin for WordPress, Blogger...